
Turmeric spiced burgers....recovery fuel!
The day before and the day after my Tough Mudder event I was on a complex carb, protein and anti-inflammation kick...I wanted to defend myself from all directions and help prevent muscle injury too!
Turmeric has long been know for it's healing qualities and anti-inflammatory properties and so I wanted to base my main meals around this beautiful spice, so often underused in my cooking. I think you've probably already guessed quinoa would be the obvious recipient!
This was my 'before' event dinner...

This was my 'after' event dinner...
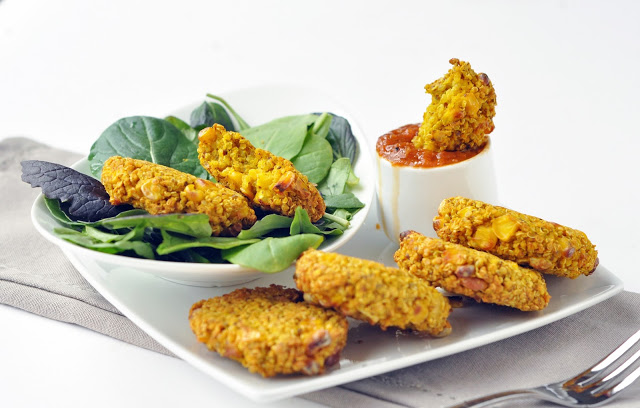
Total yellowness!!!
Both dishes were great in their simplicty, I ate the quinoa/cauli as a main dish but it would propbably be best served asa a side dish along with some other colours :-) We'll get onto that dish in ano
ther post, but today I give you the turmeric quinoa burgers.
Initial
inspiration
for the
ingredients
profile came from
and then I changed a few things up, namely the binding method, spices and cooking method.
I used almond flour as the key
ingredient
to bind them as almond flour is 'gummy' when mixed with water and is also in itself a potent anti-inflammatory, so along with onion and garlic these little burgers really should help kick sore muscles into touch (well I experienced minimal soreness after the event so who knows...)
I added a little garam masala and salt to boost the flavour, but you really want to focus on the turmeric as much as possible. Serve on a bed of spinach for even more anti-inflammatory fighting properties (and a break from all that yellow!)
Superfoods to the rescue!!

Recipe:
Turmeric spiced burgers
Serves 2
Ingredients:
1 cup cooked quinoa
1 cup sweetcorn
1-2 crushed cloves garlic or 1/2 tsp garlic granules
2 tsp ground turmeric
1/4 tsp garam masala
1/4 tsp salt
3 tbs fine almond flour
1 tbs flax
approx 1/4 cup hot water
extra water if needed
Method:
Mix the almond flour with hot water in a small bowl and mix to form a thick paste. Mix all remaining ingredients together adding the the paste last. Add a little extra water if needed to assist the binding of the mixture.
Get your had stuck in and form small flattened patties, place these on a lined or greased baking sheet. The mixture will be a bit delicate but should easily form patties that hold together well whilst baking and being turned over once.
I didn't use any oil to coat the patties as they tasted great without, but feel free to use a light coating for extra crispness if you prefer. The patties can also be lightly fried on each side as an alternative to oven baking. I baked them for approx. 30 minutes at 180C until lightly golden.


For further guidance on making gluten free choices please see
.
For tips and info on recipe measurement conversions, ingredients, substitutions and the methods behind how I do things.... check out my 'baking tips' tab at the top of the page.